IcePhotos
IcePhotos
Immich on Synology DS1821+ with Remote GPU Acceleration
A complete guide for running Immich on a Synology NAS with GPU-accelerated machine learning (face detection, CLIP search, OCR) offloaded to a dedicated NVIDIA GPU server.
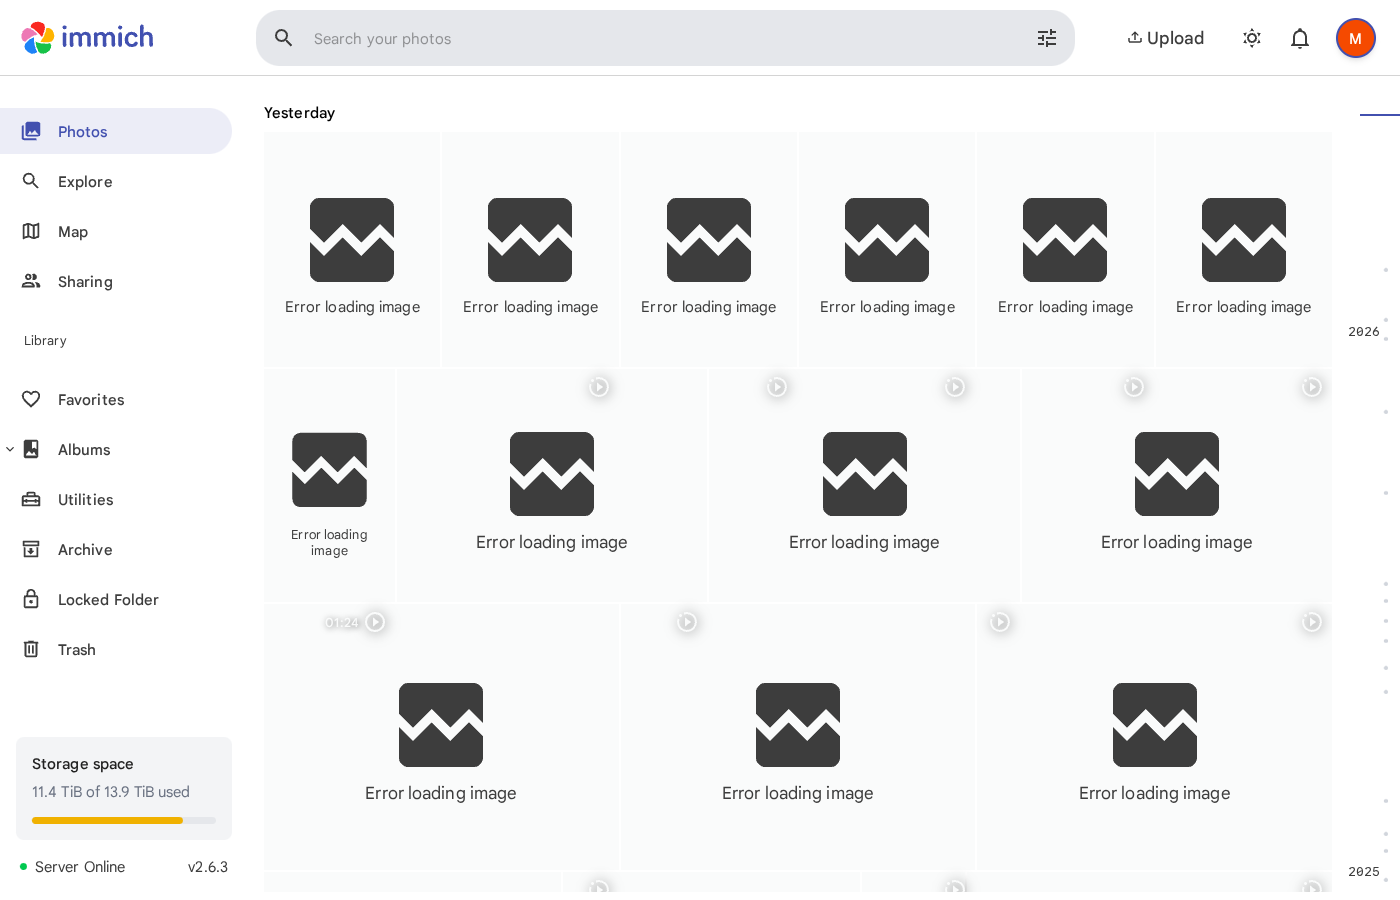
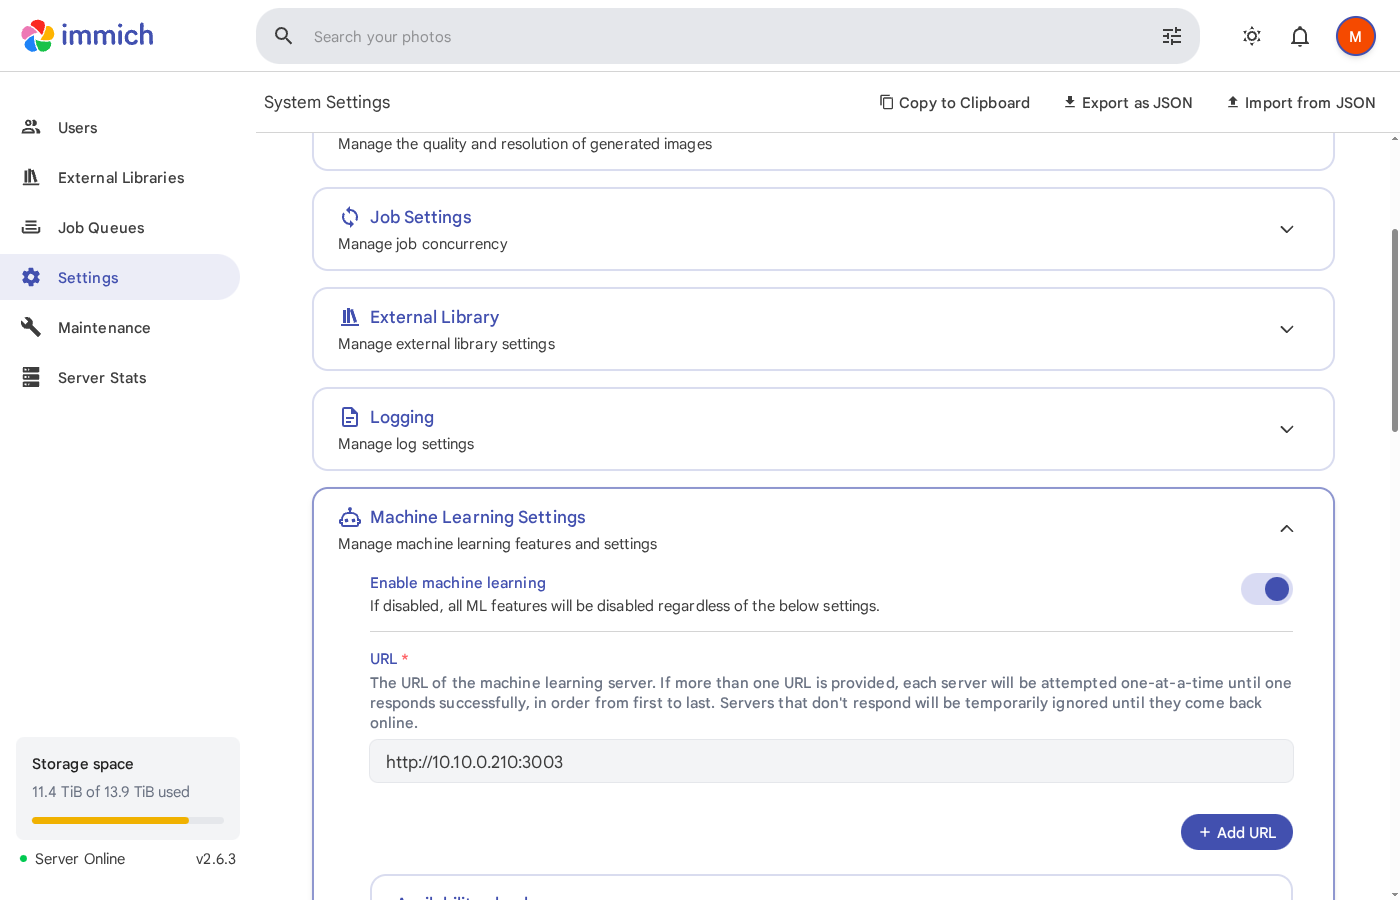
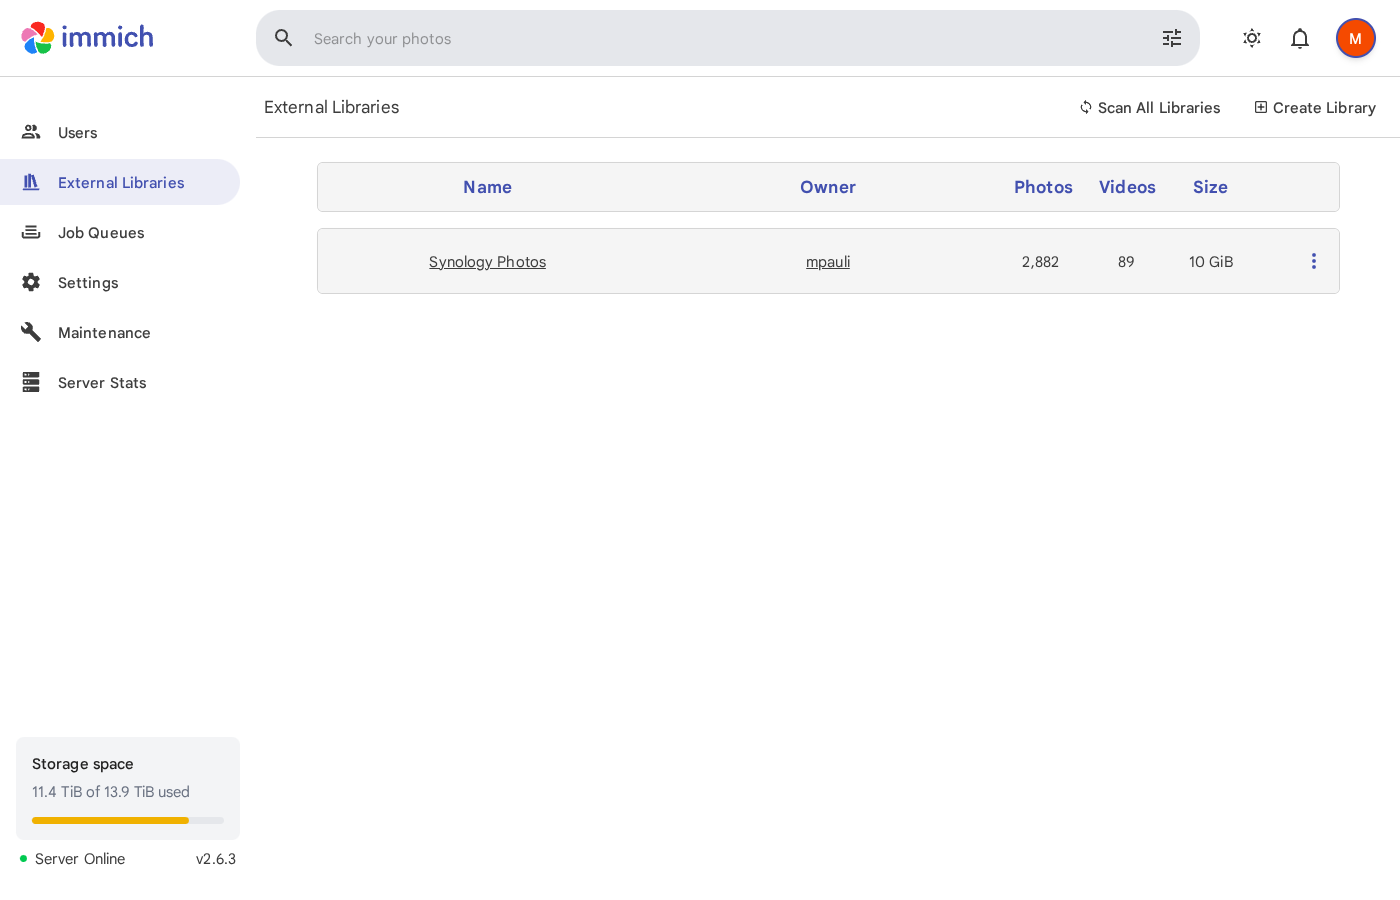
Screenshots
| Photos Timeline | Job Queues | ML Settings |
|---|---|---|
 |
 |
 |
| External Libraries | Server Stats |
|---|---|
 |
 |
Table of Contents
- Architecture Overview
- Prerequisites
- GPU Server Setup
- Synology NAS Setup
- First Launch & Configuration
- External Library (Synology Photos)
- Verification & Monitoring
- Troubleshooting
- Maintenance
1. Architecture Overview
┌─────────────────────────────────┐     ┌──────────────────────────────┐
│  Synology NAS                   │     │  GPU Server (NVIDIA GPU)     │
│                                 │     │                              │
│  ┌───────────────────────────┐  │     │  ┌────────────────────────┐  │
│  │ Immich Server    :2283    │──┼─────┼─▶│ Immich ML (CUDA) :3003 │  │
│  └───────────────────────────┘  │     │  └────────────────────────┘  │
│  ┌───────────────────────────┐  │     │  ┌────────────────────────┐  │
│  │ PostgreSQL (pgvecto.rs)   │  │     │  │ Ollama          :11434 │  │
│  └───────────────────────────┘  │     │  └────────────────────────┘  │
│  ┌───────────────────────────┐  │     └──────────────────────────────┘
│  │ Redis (Valkey)            │  │
│  └───────────────────────────┘  │
│                                 │
│  /volume1/photo (External Lib)  │
│  /volume2/docker/immich (Data)  │
└─────────────────────────────────┘
Component Responsibilities
| Component | Role | Runs On |
|---|---|---|
| Immich Server | Web UI, API, microservices, thumbnail generation | Synology NAS |
| PostgreSQL | Database with pgvecto.rs/VectorChord for vector search | Synology NAS |
| Redis (Valkey) | Job queue and caching | Synology NAS |
| Immich ML | Face detection, CLIP embeddings, OCR (CUDA-accelerated) | GPU Server |
| Ollama | Vision model inference for image captions | GPU Server |
What Gets Accelerated by the GPU
- Face Detection & Clustering — detects and groups faces across your photo library
- Smart Search (CLIP) — enables natural language search (“sunset at the beach”)
- OCR — extracts text from images for searchability
- Image Captioning — automatic descriptions via Ollama vision models
2. Prerequisites
Synology NAS
- Model: Any x86_64 Synology NAS (tested on DS1821+)
- DSM: 7.2 or later
- RAM: 8 GB minimum (32 GB recommended)
- Docker: Installed via Package Center (Container Manager)
- Docker Compose: v2.x (included with Container Manager)
- Storage: Sufficient space for thumbnails and database (~2-5 GB per 10k photos)
GPU Server
- OS: Linux with Docker installed
- GPU: NVIDIA GPU with CUDA support (tested with RTX 3060, 12 GB VRAM)
- NVIDIA Drivers: 525+ installed
- NVIDIA Container Toolkit: Required for Docker GPU passthrough
- Network: Reachable from the Synology NAS on port 3003
3. GPU Server Setup
3.1 Install NVIDIA Container Toolkit
Skip this step if you already have it installed (nvidia-ctk --version).
# Add NVIDIA repository
curl -fsSL https://nvidia.github.io/libnvidia-container/gpgkey \
  | sudo gpg --dearmor -o /usr/share/keyrings/nvidia-container-toolkit-keyring.gpg

curl -s -L https://nvidia.github.io/libnvidia-container/stable/deb/nvidia-container-toolkit.list \
  | sed 's#deb https://#deb [signed-by=/usr/share/keyrings/nvidia-container-toolkit-keyring.gpg] https://#g' \
  | sudo tee /etc/apt/sources.list.d/nvidia-container-toolkit.list

sudo apt-get update
sudo apt-get install -y nvidia-container-toolkit

# Configure Docker runtime
sudo nvidia-ctk runtime configure --runtime=docker
sudo systemctl restart docker
Verify the setup:
docker run --rm --gpus all nvidia/cuda:12.3.2-base-ubuntu22.04 nvidia-smi
3.2 Deploy Immich ML Container
mkdir -p /opt/immich-ml && cd /opt/immich-ml
Create docker-compose.yml:
name: immich-ml

services:
  immich-machine-learning:
    container_name: immich_machine_learning
    image: ghcr.io/immich-app/immich-machine-learning:v2.6.3-cuda
    volumes:
      - model-cache:/cache
    environment:
      MACHINE_LEARNING_CACHE_FOLDER: /cache
    ports:
      - '3003:3003'
    restart: always
    deploy:
      resources:
        reservations:
          devices:
            - driver: nvidia
              count: 1
              capabilities: [gpu]
    healthcheck:
      disable: false

volumes:
  model-cache:
Start the container:
docker compose pull
docker compose up -d
3.3 Configure Firewall
Allow the Synology NAS to reach port 3003:
# If using UFW
sudo ufw allow from <NAS_SUBNET>/24 to any port 3003

# If using iptables
sudo iptables -A INPUT -s <NAS_SUBNET>/24 -p tcp --dport 3003 -j ACCEPT
3.4 Verify
# Local test
curl http://localhost:3003/ping
# Expected: pong
4. Synology NAS Setup
4.1 Prepare Directories
SSH into the Synology NAS as root:
mkdir -p /volume2/docker/immich/library
mkdir -p /volume2/docker/immich/postgres
4.2 Find Synology Photos GID
If you want to import your Synology Photos library, find the group ID:
id SynologyPhotos
# Example output: uid=105733(SynologyPhotos) gid=105733(SynologyPhotos)
Note the GID (e.g., 105733) — you’ll need it in the configuration.
4.3 Create Environment File
Create /volume2/docker/immich/.env:
cd /volume2/docker/immich
# Immich version
IMMICH_VERSION=v2.6.3

# Storage paths
UPLOAD_LOCATION=/volume2/docker/immich/library
EXTERNAL_LIBRARY=/volume1/photo

# Synology Photos group GID
SYNOLOGY_PHOTOS_GID=105733

# Database (generate a strong random password!)
DB_DATA_LOCATION=/volume2/docker/immich/postgres
DB_PASSWORD=<GENERATE_A_RANDOM_PASSWORD>
DB_USERNAME=postgres
DB_DATABASE_NAME=immich

# Timezone
TZ=Europe/Berlin

# Remote ML server
MACHINE_LEARNING_URL=http://<GPU_SERVER_IP>:3003
Generate a secure password:
openssl rand -base64 24 | tr -dc 'A-Za-z0-9' | head -c 32
Security Note: The
.envfile contains your database password. Ensure it is not committed to version control and has restricted permissions (chmod 600 .env).
4.4 Create Docker Compose File
Create /volume2/docker/immich/docker-compose.yml:
name: immich

services:
  immich-server:
    container_name: immich_server
    image: ghcr.io/immich-app/immich-server:${IMMICH_VERSION:-release}
    user: "0:0"
    group_add:
      - "${SYNOLOGY_PHOTOS_GID:-105733}"
    volumes:
      - ${UPLOAD_LOCATION}:/data
      - ${EXTERNAL_LIBRARY}:/external:ro
      - /etc/localtime:/etc/localtime:ro
    env_file:
      - .env
    environment:
      IMMICH_MACHINE_LEARNING_URL: ${MACHINE_LEARNING_URL}
    ports:
      - '2283:2283'
    depends_on:
      redis:
        condition: service_healthy
      database:
        condition: service_healthy
    restart: always
    healthcheck:
      disable: false

  redis:
    container_name: immich_redis
    image: docker.io/valkey/valkey:9@sha256:3eeb09785cd61ec8e3be35f8804c8892080f3ca21934d628abc24ee4ed1698f6
    restart: always
    healthcheck:
      test: redis-cli ping || exit 1

  database:
    container_name: immich_postgres
    image: ghcr.io/immich-app/postgres:14-vectorchord0.4.3-pgvectors0.2.0@sha256:bcf63357191b76a916ae5eb93464d65c07511da41e3bf7a8416db519b40b1c23
    environment:
      POSTGRES_PASSWORD: ${DB_PASSWORD}
      POSTGRES_USER: ${DB_USERNAME}
      POSTGRES_DB: ${DB_DATABASE_NAME}
      POSTGRES_INITDB_ARGS: '--data-checksums'
      # Uncomment if your Synology storage is on HDDs (not SSDs/NVMe cache)
      # DB_STORAGE_TYPE: 'HDD'
    volumes:
      - ${DB_DATA_LOCATION}:/var/lib/postgresql/data
    shm_size: 128mb
    restart: always
    healthcheck:
      test: ["CMD-SHELL", "pg_isready -U ${POSTGRES_USER:-postgres} -d ${POSTGRES_DB:-immich}"]
      interval: 10s
      start_period: 30s
4.5 Synology-Specific Notes
Why user: "0:0"?
Synology Photos uses Synology’s proprietary ACL system, not standard Unix permissions. The photo directories show d---------+ permissions, meaning only ACL rules control access. Running the container as root ensures it can read these ACL-protected files.
Why group_add?
Adding the SynologyPhotos group GID gives the container membership in the group that owns the photo library, providing an additional layer of access.
HDD vs SSD
If your PostgreSQL data directory is on spinning disks (HDDs), uncomment DB_STORAGE_TYPE: 'HDD' in the database service. This optimizes PostgreSQL’s I/O patterns for rotational storage. If you have an NVMe cache (Synology SSD Cache), leave it commented out.
4.6 Start Immich
cd /volume2/docker/immich
docker compose pull
docker compose up -d
Verify all containers are running:
docker ps --filter "name=immich" --format "table \t\t"
Expected output:
NAMES             STATUS                    PORTS
immich_server     Up X minutes (healthy)    0.0.0.0:2283->2283/tcp
immich_postgres   Up X minutes (healthy)    5432/tcp
immich_redis      Up X minutes (healthy)    6379/tcp
5. First Launch & Configuration
5.1 Create Admin Account
Open your browser and navigate to:
http://<SYNOLOGY_IP>:2283
Create your administrator account on the welcome screen.
5.2 Verify ML Connection
Go to Administration > Settings > Machine Learning.
The URL should already be set to your GPU server (from the MACHINE_LEARNING_URL environment variable). Verify the status shows as “healthy”.
If you need to change it manually, set:
http://<GPU_SERVER_IP>:3003
5.3 Verify via API
# Test server
curl http://localhost:2283/api/server/ping
# Expected: {"res":"pong"}

# Test version
curl http://localhost:2283/api/server/version
# Expected: {"major":2,"minor":6,"patch":3}
6. External Library (Synology Photos)
The external library feature lets Immich index your existing Synology Photos library read-only, without moving or duplicating files.
6.1 Create an API Key
In the Immich Web UI:
- Click your profile icon (top right)
- Go to API Keys
- Create a new key and copy it
6.2 Get Your User ID
curl -s -H "x-api-key: <YOUR_API_KEY>" \
  http://localhost:2283/api/users/me | python3 -m json.tool
Note the id field (a UUID).
6.3 Create External Library
curl -s -X POST \
  -H "x-api-key: <YOUR_API_KEY>" \
  -H "Content-Type: application/json" \
  -d '{
    "name": "Synology Photos",
    "ownerId": "<YOUR_USER_ID>",
    "importPaths": ["/external"]
  }' \
  http://localhost:2283/api/libraries
This automatically excludes Synology system directories:
**/@eaDir/**(Synology metadata)**/#recycle/**(Synology trash)**/#snapshot/**(Synology snapshots)
6.4 Start Library Scan
curl -s -X POST \
  -H "x-api-key: <YOUR_API_KEY>" \
  http://localhost:2283/api/libraries/<LIBRARY_ID>/scan
Or use the Web UI: Administration > External Libraries > Scan.
6.5 Automatic Scanning
To keep the library in sync, you can set up a periodic scan via cron on the Synology:
# Edit crontab
vi /etc/crontab

# Add a scan every 6 hours
0 */6 * * * root curl -s -X POST -H "x-api-key: <YOUR_API_KEY>" http://localhost:2283/api/libraries/<LIBRARY_ID>/scan
Or configure it in the Immich Web UI under Administration > External Libraries > Scan Settings.
7. Verification & Monitoring
7.1 Check Job Status
curl -s -H "x-api-key: <YOUR_API_KEY>" \
  http://localhost:2283/api/jobs | python3 -m json.tool
Or view in the Web UI under Administration > Jobs.
Key jobs to monitor:
- Thumbnail Generation — creates preview images (runs on NAS CPU)
- Metadata Extraction — reads EXIF data (runs on NAS CPU)
- Smart Search — generates CLIP embeddings (runs on GPU)
- Face Detection — detects faces in photos (runs on GPU)
- Facial Recognition — clusters detected faces (runs on GPU)
- OCR — extracts text from images (runs on GPU)
7.2 Check ML Server Health
# From the Synology NAS
curl http://<GPU_SERVER_IP>:3003/ping
# Expected: pong
7.3 Check Logs
# Immich Server
docker logs immich_server --tail 50

# PostgreSQL
docker logs immich_postgres --tail 20

# On the GPU server
docker logs immich_machine_learning --tail 50
Look for these key log messages:
Machine learning server became healthy— ML connection establishedFinished disk crawl, X file(s) found— Library scan completedImported X file(s) into library— Import completed
8. Troubleshooting
“Error loading image” in the Web UI
Cause: Thumbnails are still being generated. After importing thousands of photos, the thumbnail generation job needs time to process them all.
Solution: Check the job queue in Administration > Jobs. Wait for “Thumbnail Generation” to complete. Images will appear progressively as their thumbnails are created.
ML Server Shows as Unhealthy
Cause: The GPU server is unreachable or the ML container isn’t running.
Check:
# From Synology
curl http://<GPU_SERVER_IP>:3003/ping

# If unreachable, check on the GPU server:
docker ps | grep immich_machine_learning
docker logs immich_machine_learning --tail 20
Common fixes:
- Ensure port 3003 is open in the GPU server’s firewall
- Verify the ML container is running:
docker compose up -don the GPU server - Check NVIDIA drivers:
nvidia-smion the GPU server
Permission Denied on External Library
Cause: Synology Photos uses ACL-based permissions, not standard Unix permissions.
Solution: Ensure the Immich server container runs as root (user: "0:0") and includes the SynologyPhotos group (group_add). Both are configured in the provided docker-compose.yml.
Verify access from inside the container:
docker exec immich_server ls -la /external/
docker exec immich_server head -c 10 /external/path/to/any/photo.jpg
PostgreSQL Healthcheck Slow
Cause: The default Immich PostgreSQL image has a 5-minute healthcheck interval.
Solution: Override the healthcheck in docker-compose.yml (already done in this setup):
healthcheck:
  test: ["CMD-SHELL", "pg_isready -U postgres -d immich"]
  interval: 10s
  start_period: 30s
Out of Memory on Synology
Cause: Immich + PostgreSQL + Redis can use significant RAM, especially during initial import.
Solution:
- Ensure at least 8 GB RAM (32 GB recommended)
- Monitor with
free -h - Consider adding swap:
swapon --show
9. Maintenance
Updating Immich
- Update the
IMMICH_VERSIONin.envon both the Synology and GPU server - Pull and restart:
Synology:
cd /volume2/docker/immich
docker compose pull
docker compose up -d
GPU Server:
cd /opt/immich-ml
# Update the image tag in docker-compose.yml
docker compose pull
docker compose up -d
Important: Always update both the server and ML containers to matching versions.
Database Backup
Immich creates automatic database backups. You can also create manual backups:
docker exec immich_postgres pg_dump -U postgres immich | gzip > immich_backup_$(date +%Y%m%d).sql.gz
Monitoring Disk Usage
# Immich data
du -sh /volume2/docker/immich/library/
du -sh /volume2/docker/immich/postgres/

# External library (read-only, Synology Photos)
du -sh /volume1/photo/
Version History
| Date | Immich Version | Notes |
|---|---|---|
| 2026-03-28 | v2.6.3 | Initial setup |
Credits
- Immich — High-performance self-hosted photo and video management
- Ollama — Run large language models locally
- Setup automated with Claude Code